mDecks Music Apps That Use AudioKit

At mDecks Music we develop apps to study and practice music and music theory, mostly for intermediate to advanced musicians.

youtubeface2.jpg

Our apps need to interact with the user in many ways: from playing simple chords using sampled sounds to complex accompaniments, received and send MIDI data and also listen to audio input from the user and convert into useful musical information.

Without a doubt, using AudioKit allowed us to achieve all these tasks easily and with reliable results.

Here are some of the apps where we used AudioKit:

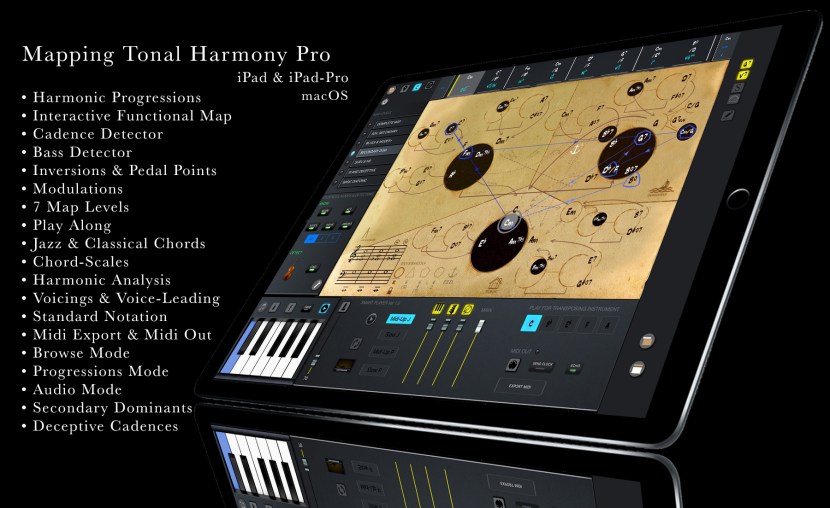
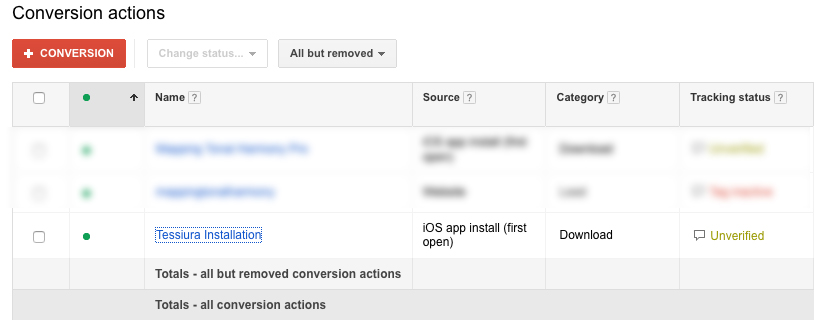
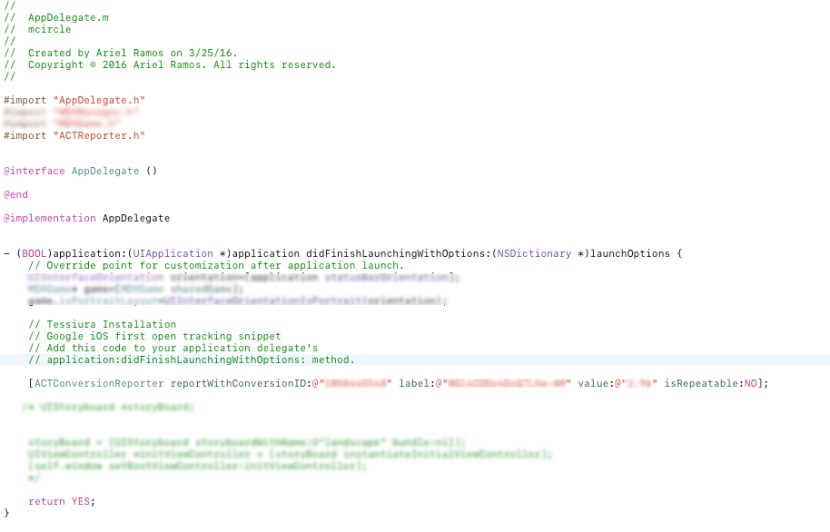
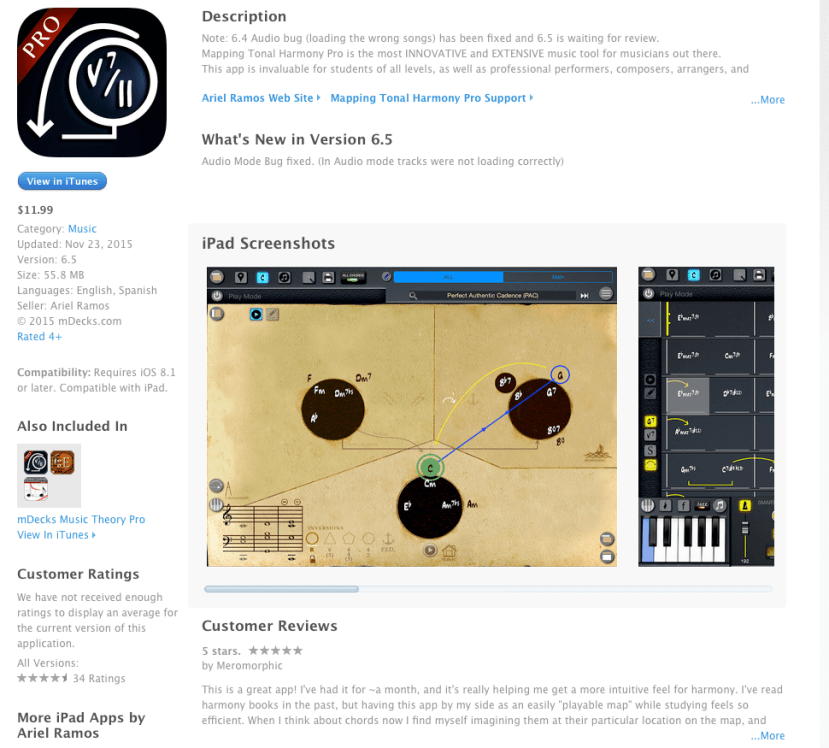
In Mapping Tonal Harmony Pro and Tessitura Pro we play our own sampled sounds, create and play MIDI sequences and the user is able to mix volume levels, reverb amount and change the tempo LIVE while the sequence is playing

Mapping Tonal Harmony Pro is an app with an interactive map that reveals the secrets of harmony. You can study harmony in different styles from Classical to Jazz and Pop, write your own songs and create charts or use it as a ply along to practice improvisation.

mthpro6prom1.jpg

Tessitura Pro contains all scales & modes in music. You can study how modes relate to each other, source scales, tensions vs. chord-tones and also practice using different melodic patterns and approach notes.

In See Music, which is a sight reading app that listens to the player and gives instant note-by-note feedback on their performance, we were able to, not only identify pitch, but also to transcribe the entire performance into standard music notation and include a pitch accuracy report on every note in the score.see-music.jpg

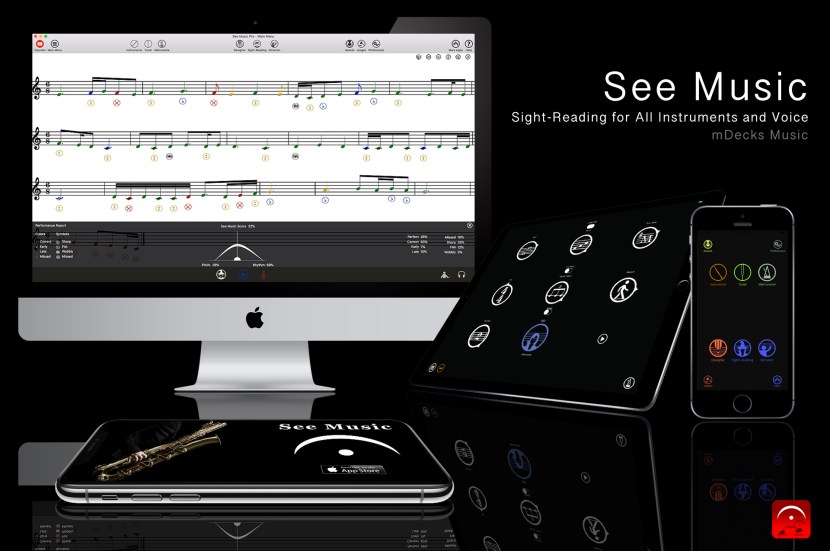
When we were designing the app the hardest decision to make was what to use to do pitch recognition.

Implementing code that analyzes audio and turns it into pitch and length information involves lots of advanced math, low level access to memory and functions. Soon we realized this was much tougher than expected. 

After finding AudioKit, we realized that 90% of the work has already been done. The library is simple enough to incorporate to the project, well documented and works really well.

We were able to solve the entire process by just using the AKFrequencyTracker which returns frequency and amplitude.

Since we wanted to analyze an entire musical phrase we needed something a bit more elaborate than a simple tuner.

In our solution we used a timer to stored all the data received from the tracker

      conductor.mic.start()

        conductor.tracker.start()

        timerito = Timer.scheduledTimer(timeInterval: timeBetweenReads,

                                        target: self,

                                        selector: #selector(self.readAndSaveNotes),

                                        userInfo: nil,

                                        repeats: true)

The readAndSaveNotes function simple stores the data at regular intervals (timeBetweenReads) with 3 different listening modes (readStyle)

@objc func readAndSaveNotes() {

        if isListening {

            let amplitude:Float = Float(conductor.tracker.amplitude)

            let frequency:Float = Float(conductor.tracker.frequency)

            if frequency < K.CurrentFreq {

                if (!isRecording && amplitude > minAmpStartTrigger) && (readStyle != K.KReadForASetAmountOfTimeStartRightAway) {

                    isRecording = true

                    listeningStartTime = NSDate().timeIntervalSinceReferenceDate

                }

                if isRecording {

                    switch readStyle {

                    case K.kReadUntilSilence:

                        if amplitude > minAmpEndTrigger {

                            recordNote(f: frequency, a: amplitude)

                        } else if thereIsData {

                            stopListening()

                        }

                        break

                    case K.kReadForASetAmountOfTime:

                        if !isTimeToStop {

                            recordNote(f: frequency, a: amplitude)

                        } else {

                            stopListening(processNotas: true, compareNotas: true)                        

                        }

                        break

                    case K.KReadForASetAmountOfTimeStartRightAway:

                        if !isTimeToStop {

                            recordNote(f: frequency, a: amplitude)

                        } else {

                            stopListening(processNotas: true, compareNotas: true)                        

                        }

                        break

                    case K.kTuning:

                        reportNote(f: frequency, a: amplitude)

                        break

                    default:

                        break

                    }


                }

            }

        }

    }

We found the biggest challenges were: how to ignore background noise and how to re-interpret frequency base on the instrument’s timbre and how to get the starting and ending time of note with accuracy (since the player is playing a melodic line)

Since See Music is an app for all instruments, it must interpret correctly the notes played by instruments with different timbres.

The weight of the overtones is different on every instrument, so the collected frequencies using the AKFrequencyTracker on a single note is usually a set of related frequencies based on the instrument’s timbre.

We found the best way to achieve this was to parametrize the way we collect the data from the AKFrequencyTracker based on each instrument

Here’s an example of the parameters settings for a default instrument:

    var zeroAmplitudThreshold:Float = 0.005

    var noiseAmplitudeThreshold:Float = 0.1  // where notes are probably noise

    var timeBetweenReads:TimeInterval = 0.025  // how fast to read

    var peakThreshold:Float = 0.07 // to consider a new sample a peak

    var minimumNoteDurationInIndexes: Int = 3 // how many samples are good for noteDuration

Also to identify the notes, don’t forget to reduce the frequencies to the pitch and octave that makes sense on an instrument.

Here’s a simple class we used to reduced the frequencies and indentify notes

class MDXSemiFrequencyAmplitude : MDXSimpleFrequencyAmplitude {

    let kpl:MDXPitchListenerConstants = MDXPitchListenerConstants.sharedPitchListenerConstants

    let game:MDXGame = MDXGame.sharedGame


    var reducedFrequency:Float = 1.0

    func calcReducedFrequency() {

        var rF:Float = frequency

        let minF:Float = kpl.reducedFreqs[0]

        let maxF:Float = kpl.reducedFreqs[11]


        while rF > maxF {

            rF /= 2.0

        }

        while rF < minF {

            rF *= 2.0

        }


        reducedFrequency = rF

    }


    var expectedRedFreq:Float = 0.0


    var expectedFreq:Float {

        get {

            return powf(2, Float(octave)) * expectedRedFreq

        }

    }


    var octave:Int = 0

    var midi:Int = 0


    func identifyNote() {

        let indexAndWas12:(Index:Int, was12:Bool) = kpl.getNoteIndexByReducedFrequency(reducedFrequency)

        let index = indexAndWas12.Index


        if indexAndWas12.was12 {

            reducedFrequency = reducedFrequency / 2

        }


        octave = Int(log2f(Float(frequency) / reducedFrequency))


        expectedRedFreq = Float(kpl.reducedFreqs[index])


        midi = 12 + octave * 12 + index – game.curInstrument.transposition

    }


    init(_ sfa:MDXSimpleFrequencyAmplitude) {

        super.init(f: sfa.frequency, a: sfa.amplitude)

        tiempo = sfa.tiempo – kpl.listeningStartTime – kpl.timeBetweenReads

        calcReducedFrequency()

        identifyNote()

    }

}

Advertisement

How to track Conversions for iOS App Sales

For the last version of Tessitura Pro 1.9.5, I created a short promo video and started a in-stream video campaign in adwords.

The most important aspect of a campaign is to be able to track conversions (how many views of the video turn into actual installations of the app)

Here are the steps I followed to make this happen.

  1. Create and Upload the video to YouTube
  2. Create a new Video campaign in google adwords
    ytc1

    Make sure you choose Mobile app installs and find your app using the search in the Your mobile app drop down search boxtcmo2.jpg
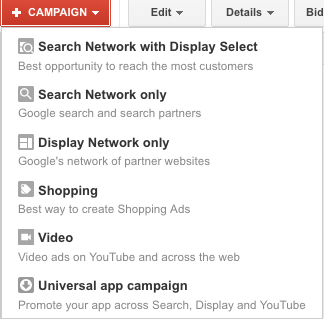
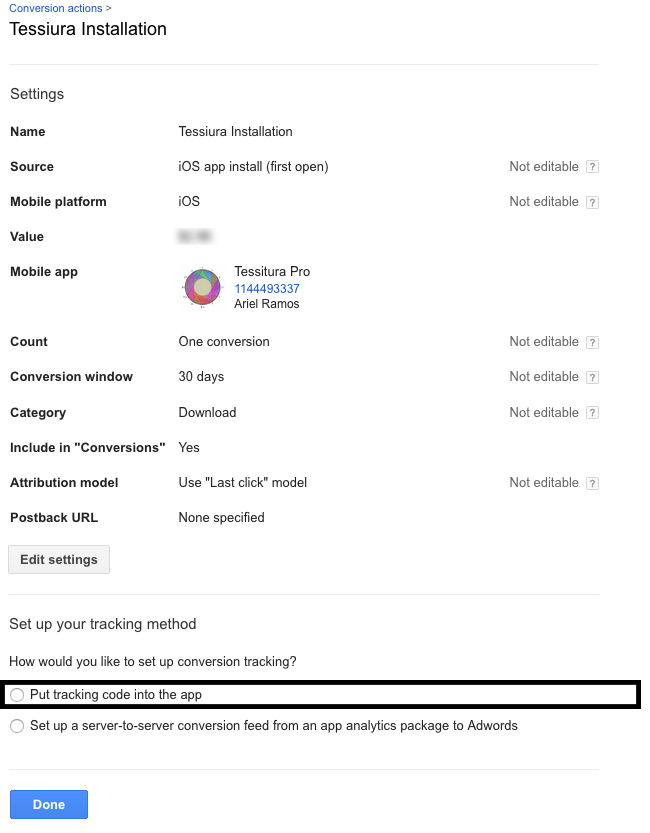
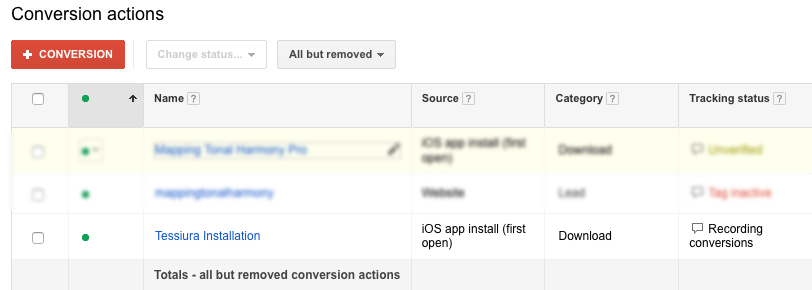
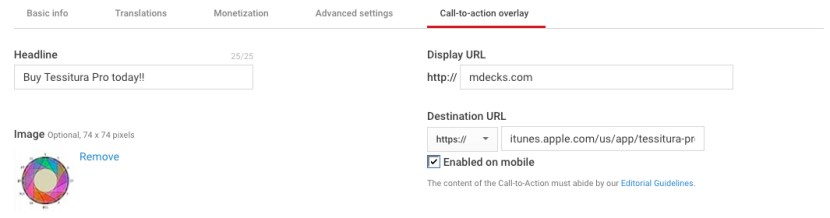
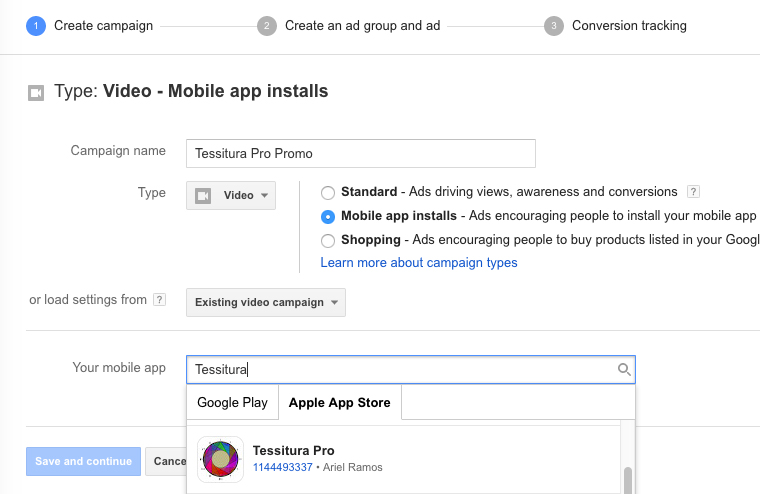
Once you’ve selected your app, new options will appear.
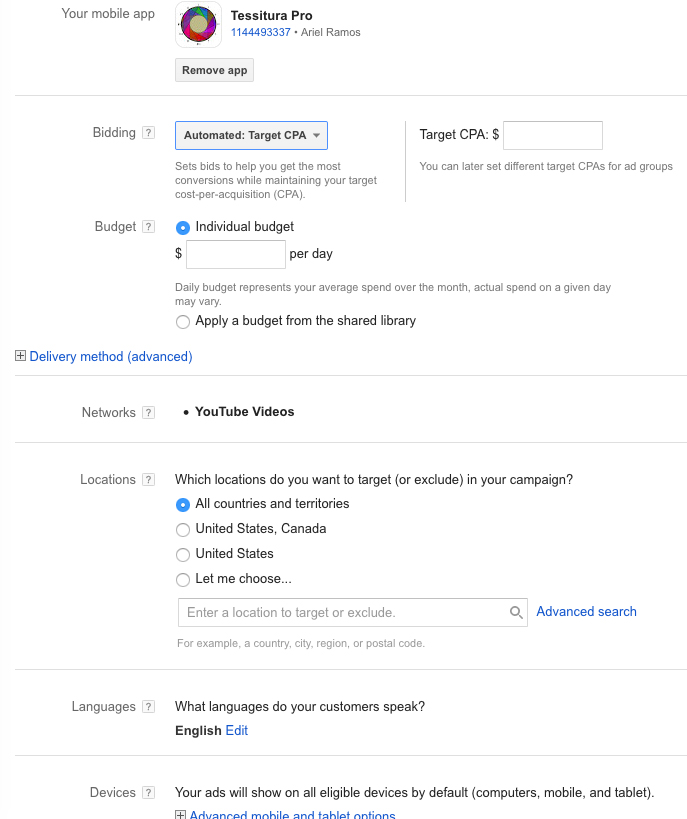
    jut5.jpg
    Choose the Bidding, etc…
    I chose a specific Advanced mobile and tablet options since I want the potential viewers of my promo video to buy the app directly from within the video (actually it will take them to the App Store but on the same device they are viewing the video)

    Then name your Ad group name for the campaign (you could have many different promo videos or different setting for the same video in your campaign, each of those would be an Ad group which is linked to one video).

    And search for your video on YouTube.
    hfyt6.jpg
    Once you’ve selected your video you will have more options to choose from.
    I am using an In-stream ad which will appear at the beginning of some other video, but you may choose a Video discovery ad type that will appear as a recommended video on some part of the screen depending on the device.

    You will also need to name this specific ad in the Ad name box (since you might want to have the same video showing as a different kind of ad for example)
    fhryhf33.jpg

    Then you will be shown the following page:
    fhy77.jpg

  3. Click on the Conversions tool link
    fbf76f6.jpg
  4. Find and click on the name of the conversion you’ve just created (in my case is Tessitura Installation, you may rename it as well)
  5. On the next page choose how you will setup up conversion tracking.
    I chose Put tacking code into the app
    fbfnhhr.jpg
  6. Download the Google Conversion Tracking SDK
    fhf7ryyr6gfhgf.jpg
  7. Open your project in XCode, unzip the downloaded file and drag the entire folder into your project. Make sure you have the Add to target selected
    gf9g98.jpg
  8. The SDK library references the iOS AdSupport development framework which may not already be part of your project. To add this framework, open the Link Binary With Libraries dropdown under the Build Phases tab. Add the framework from the iOS SDK using the + button.
    fy7f333.jpg
  9. Also, you need to add -ObjC to the Other Linker Flags of your application target’s build setting:
    1. In Xcode’s project navigator, press the blue top-level project icon.
    2. Click on your target, then the Build Settings tab.
    3. Under Linking > Other Linker Flags, add -ObjC to both Debug and Release.
      hfnr6gf.jpg
  10. Finally you need to add the [ACTConversionReporter…] code snippet to your AppDelegate.m in the didFinishLaunchingWithOptions
    bcmd334.jpg
  11. Now when you run your project you should get a successful ping to Google in your projects console’s window
    4rfvgttb.jpg
  12. If you go back to the conversions pages in Google Adwords you will eventually see a change in the Tracking Status column saying Recording Conversions (google says it take a couple of days, it work sooner for me)
    fhf766r33e.jpg
  13. It is important that you add a Call-to-action overlay on your promo video.
    savet2.jpg
    So go to your video edit page on your YouTube account and choose the Call-to-action overlay tab. Add a headline, a display URL (I used my website mDecks.com), a destination URL (use the complete iTunes Store url for your app without the https:// itunes.apple.com/us/app/tessitura-pro/id1144493337?ls=1&mt=8 ) and your app’s icon as a 74×74 image
    tesacori.jpg


That’s all. Now I am able to track every single Tessitura Pro installation from the promo video I’ve created as a conversion.

iTunes Connect error -22421 solved!

Submitting and app to iTunes Connect without errors is not as simple as it should be, although the review process is now so much faster than it used to be. Back in 2015 app reviews would take almost a week before you knew if the app had been rejected or not. These days (and I am talking November 2016) app reviews take only one day before they are live on the App Store.

Today I tried uploading a new version of Tessitura Pro 1.9.4 to iTunes Connect from within XCode 8.1 and I got an error with code -22421

tessituraweb1

Searching on the internet I couldn’t find any case that applied to mine. Apparently -22421 is returned as an error code for several different reasons.

Here’s the problem I had: On my previous (most recent) version of Tessitura, I selected 9.3 as the iOS version in Deployment Target. But for some reason after opening the project in  XCode 8.1 my deployment target had changed to 8.4

tss34

I am guessing you can’t downgrade the deployment target on an app (although I don’t this for a fact). I changed it back to 9.3 and the new Tessitura built uploaded without any problems

In this new version I am adding a google adwords conversion tracking snippet to track installs on the app and I thought that was the problem. I still don’t know whether the tracking code will be accepted in the review process, but I will write a new post with my findings once it’s worked.

Google Rating nightmare for iOS Apps

Today I was googling one of my own apps called Mapping Tonal Harmony Pro as I usually do, using the search tools and filtering the results for last-24 hours, to see what new pages were talking about the app or linking to it.

A new version of the app was released three days ago (version 6.5) on the App Store which means there could be no new reviews, for the new version, from users for a couple days (or more.)

Mapping Tonal Harmony Pro has received almost all 5 star reviews and it has an average of 4.5 rating on the App Store

Screen Shot 2015-11-30 at 9.44.41 PM.png

To my surprise, I found the google results for my app on the App Store showing a 1-star Rating!!!

Screen Shot 2015-11-30 at 9.40.07 PM.png

I don’t know how google is obtaining these results, but it is really frustrating. You work so hard on your product to find that a stupid robot routine returns a totally wrong and damaging result.

I, of course, went to the google help forum to start a new topic and see if I could get some answers… I searched for similar topics to see if the issue had been answered and I found an exact topic that was labeled “ANSWERED”! That’s great, I thought, let’s see what they say…

There are hundreds of entries from iOS developers complaining and the answer is:

Screen Shot 2015-11-30 at 10.15.07 PM

So the answer’s just a bureaucratic statement with no clear way of knowing when or if the problem will be solved.

It would be so easy and fair to just take the rating away until the problem has been solved. I wonder what the real reason is, if there is one other than negligence.

For now, all developers will have to accept that there apps will show a 1-Star Rating every time the release a new version.

The negative power of usernames and how to solve it

Mapping Tonal Harmony Pro 6

Today we sent the new version 6.3 of Mapping Tonal Harmony Pro to the App Store. This has been one of the biggest projects we’ve ever done. We could have easily created 10 (or more) complete apps with Mapping Tonal Harmony Pro. You can get this incredible app for the price of 2 cups of coffee! but app buyers don’t care, it’s an app, it should be $0.99 or free.

The app works really well, and we are getting great reviews, except when it comes to the infamous USERNAME.

The new version allows the user to use the app without a username (which I strongly recommend implementing in your apps, even if the user can’t access half of the features in them) People hate log-ins, passwords, sign-ups, etc. They are so sick of it, that they don’t even check what information you require them to submit.

In Mapping Tonal Harmony Pro 6.0, we asked the user to create a username and a passcode (so they could access the online database and share progressions with other users.) We didn’t ask for email or any other contact information, we were not trying to collect any data from the users. There was no confirmation process, no facebook, no twitter, nothing at all.
Why did we do this? Because we are also sick of this new data collection trend to target us as a selling point.

Did the users check what they needed to do? NO. As soon as they saw the word USERNAME, that was it! We received many emails asking why we were asking for personal information, even after we showed them there was no personal data required at any moment, they still didn’t like it!

So, lesson learned: “Don’t ask for a username even if you need to” always give the user the option of using the app without a username.

http://mdecks.com

Playing music within your app

We released Mapping Tonal Harmony Pro 6 a few days ago.

One of the best features in the app is to be able to load and play tracks from the iPad’s Library. The process is pretty straight forward but we’ve encounter a few unexpected problems in the process.

We wanted the user to be able to pick a track from their library and load it into the app.
In order to do this the best option is to use the mediaPicker
This is how you call it:
– (void)chooseASongFromYourLibraryOnView:(UIViewController*) pViewController {
    MPMediaPickerController *picker =
    [[MPMediaPickerController alloc] initWithMediaTypes: MPMediaTypeMusic];
    
    picker.delegate                     = self;
    picker.allowsPickingMultipleItems   = NO;
    picker.prompt                       = NSLocalizedString (@”Select any song from the list”, @”Choose one song only”);
   
    curPickerController=picker;
    [pViewController presentViewController:picker animated:YES completion:nil];
}

Here’s the function called after the user has picked a track
– (void) mediaPicker: (MPMediaPickerController *) mediaPicker didPickMediaItems: (MPMediaItemCollection *) mediaItemCollection
{
    [myPlayer setQueueWithItemCollection:mediaItemCollection];
    NSArray *itemsFromGenericQuery = [mediaItemCollection items];
    self.pickedMediaItemSong=[itemsFromGenericQuery objectAtIndex:0];
    [curPickerController dismissViewControllerAnimated:NO completion:nil];

}

So, we saved the item in pickedMediaItemSong

To play and draw the wave-form representation of the track you need to get the song as a AVURLAsset

asset = [[AVURLAsset alloc] initWithURL:[self.pickedMediaItemSong valueForProperty:MPMediaItemPropertyAssetURL] options:nil];

But, the app would not play items from the cloud

Solution: filter the items shown by the mediapicker to non-cloud items only
add:     picker.showsCloudItems=NO; before you present the ViewController

Now, everything seemed to work fine for a while but every now and then the MPMediaItemPropertyAssetURL would retrun NULL (the asset would end up being nil). And it only happened with a few tracks in our library.

Why? Becuase those tracks had DRM!!

Here’s what Apple Says:

About iTunes Plus

Learn more about iTunes Plus, the high-quality format of songs and music videos available through the iTunes Store.

iTunes Plus refers to songs and music videos in high quality AAC format that don’t have Digital Rights Management (DRM).

All songs and music videos now for sale in the iTunes Store are iTunes Plus. In some cases, if you previously bought music with DRM from the iTunes Store, you can download the higher quality, DRM-free versions of your songs with a subscription to iTunes Match. The tracks must show as Matched or Purchased in the iCloud Status column in your iTunes library, and the same album or song must still be available in the iTunes Store.

To upgrade your music to iTunes Plus, follow these steps on your computer:

  1. Open iTunes.
  2. If you’re not already, sign in with your Apple ID and password.
  3. Click the My Music tab at the top of iTunes.
  4. Click the song or album you want to upgrade.
  5. Press the delete key on your keyboard. In the message that appears, click Move to Trash.
  6. Click the iTunes Store tab at the top of iTunes.
  7. Under Quick Links on the right-hand side of iTunes, click Purchased.
  8. Click Music in the upper-right corner of iTunes.
  9. Find the song or album you want to upgrade.
  10. Click the iCloud Download icon   on the song or album to download the new version.

Putting iPhone’s CoreMotion Technology to the Test

In our latest music app “Sounds of Christmas by mDecks Music” we wanted to create the illusion of playing a virtual instrument with your iPhone in 3D space. The user would hit “AIR” as if it were Bells and the iPhone will produce sound (notes, chords, etc)

To achieve such effect, we had to user iPhone’s CoreMotion Technology which allows access to all the iPhone’s motion  detection system. You can read more about it on my previous post Turning an iPhone into a Musical Instrument

Now, if you have ever worked with MIDI, Samplers and Sequencing software, you know what latency is. For those who do not know: Latency is the amount of time that takes all your software and hardware to turn an “action” (command, process, etc) into sound.

There’s always latency involved in sound production, regardless if you are using computers or not.  The speed of sound is not infinite which could be interpreted as already having an embedded amount of latency ( you know how in a tennis match you see the ball being hit and much later you hear the sound.) There’s latency when you play a real Acoustic Piano, since your action of pressing a key needs to be mechanically translated into hitting a string with a hammer. Of course these conversions are so fast that the pianist would not notice them (or at least can cope with)

When using MIDI, software and samplers, we add a full new set of conversions that need to be done before sound is finally produced. Your action in the keyboard is turn into a midi signal, the midi signal is turn into a note request for the sampler which has to ask the computer to access the hard drive (or memory if possible) and read the sound file which is then processed into a music note sent to your sound card which converts that information into sound and output it via your speakers.

An acceptable latency is one that produces the sound fast enough for you to perceive it as being in real time, and does not affect your playing no matter how fast you play. Musicians are tuned to feel that delay much better than the average listener and a delay of 20ms is big enough to be noticeable. An acceptable latency for musicians is below 12ms.

If we want to use the iPhone motion to trigger notes we then have to treat that motion as if it were a key been played on a keyboard, then turn it into MIDI send it to a sampler, etc. It was crucial to create a method that could detect and process motion in a very short amount of time (<1ms) and the question was if iPhone’s CoreMotion was fast enough to make this possible.

After our first test we realized that not only iPhone’s CoreMotion is incredibly fast but it is also so precise that we were able to simulate virtual Bells begin hit by the iPhone at any tempo we wanted.

Christmas Sounds by mDecks Music turned also into a rhythmic and sight-reading training tool where the user can perform a song at any tempo and, we decided to include rhythm scores of all songs for music teachers and students since this is such an intuitive way of learning and practicing rhythms

You can print all scores from your iPhone within the app or, you may download the eBook in PDF format with all songs notated as rhythm.

Turning the iPhone into a Musical Instrument

While developing our new Christmas Puzzles by mDecks Music app we did an experiment with the CoreMotion module of the iPhone. CoreMotion lets you detect and track movements of the iPhone in real time.

There are many different approaches to implement apps that can handle iPhone movement. The most frequently used technique is to use a method that detects the iPhone being shake but it is not precise and did not work for us. For a more precise tracking method you need to use CoreMotion.

In our solution, we were able to implement a routine that would detect the iPhone movement when the user pretends to be hitting imaginary bells in front of him/her. Our algorithm ended up being very simple and, the response, really fast and efficient. We managed to create different detection algorithms and included in the app.

We created music files that would play a song using the rhythm played by the user as source. You may print the rhythm score to practice our rhythmic sight reading and/or learn how to read and play rhythms while performing a real song, which we think makes practicing rhythms very intuitive and fun.

We turn our first verision into an All-Christmas app called : Sounds of Christmas by mDecks Music which at the moment is waiting for review on the App Store. ( Sounds of Christmas webpage )

Here are our video demos:

To do this you need a CMMotionManager.

– (CMMotionManager *)motionManager
{
    static dispatch_once_t onceToken;
    dispatch_once(&onceToken, ^{
        motionManager = [[CMMotionManager alloc] init];
    });
    return motionManager;
}

and then start updating the iphone motion at a specific updateInterval.

– (void)startUpdatingWithFrequency:(int)fv
{
    NSTimeInterval delta = 0.005;
    NSTimeInterval updateInterval = 0.01 + delta * fv;
    if ([motionManager isAccelerometerAvailable] == YES) {
        [motionManager setAccelerometerUpdateInterval:updateInterval];
        [motionManager startDeviceMotionUpdatesToQueue:[NSOperationQueue mainQueue] withHandler:^(CMDeviceMotion *motion, NSError *error) {
            [self CALL-YOUR-ROUTINE-HERE];
        }];       
    }
}

You can get all the updated information by using:

motion.userAcceleration.x; //or y or z
motion.attitude.roll; // or pitch or yaw

Once you’ve obtained this data in real time, it’s up to you to create an algorithm that would interpret the device’s movement. It is crucial to set up a coherent updateInterval. It can’t be too short or too long. You have to find it by trial and error.

How to: In-App Purchase On Sale on the App Store

Changing the price of an app on the App Store is pretty straight forward. You go to the Pricing tab of your app in iTunes Connect and then edit it with the Tier you want. You must remember to set a starting date and an ending date. (Use Now to set the price change right away, and use None on the ending date if you want to keep that price indefinitely.)

If you have in-app purchases for a particular app, and you want to change the pricing for them, you must then go to the In-app purchase tab in iTunes Connect then click on the in-app purchase you want to edit. On the popup screen you will see the current setting for that in-app purchase but you have to click on the edit button to change any data including the price.  Then you can choose the new pricing exactly as you do with the app pricing, setting a new tier, starting date and ending date.

Pretty easy, eh? It took me five minutes to change all the in-app purchase prices on my 60 Top Hat Piano Grooves Vol. 1 app which is now ON SALE for $3.99 (was $4.99) and every single module is now $0.99 (were $1.99) except for the rock & pop grooves since there’s quite a few more of those.

Now you can buy 60 lessons with video tutorial & demo, compete piano score, metronome included in the score to practice all for only $3.99,

less than 7 cents $0.07 a lesson, how ridiculous (“amazing”.- I meant)  is that!